
Esprit Body Mount Repair
Removing and fitting
by Carl Charlesworth
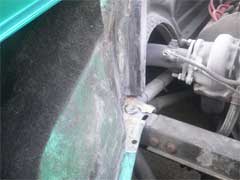
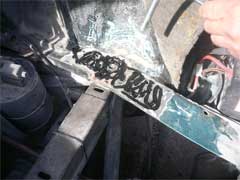
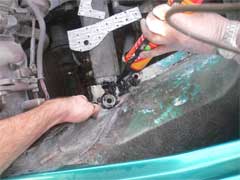
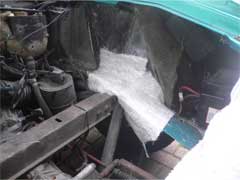
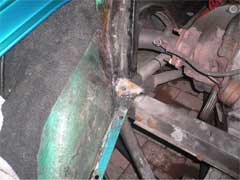
The bolt holes used to secure the body to chassis in the middle of the engine bay are clearly a weak point on the Esprit. As can be seen there is only a relatively thin strip of fiberglass on the right hand side straddling the chassis mount. The passenger side is even more vulnerable as the exhaust cuts through on this side leaving the chassis mount suspended off the rear of the wheel arch.


This is clearly a serious problem and prone to damage as the pictures I have taken show the state of the mounts only a couple of months after a repair by a firm of Esprit specialist. Please bear in mind that I use the car at weekends only and have covered no more than a few hundred ‘fairly sensible’ miles. The specialists had done the repair using some sort of resin to rebound to the existing fiberglass. They had also bounded around the oval spacers that sit proud of the body work to try and build up more strength. I also purchased new 12mm nuts blots and washers as for some reason my bolts were very long and only 10mm diameter. This would also allow me to remove the oval spacers and still tighten down the body to the chassis when the job is complete. These first pictures are after I have removed the broken and cracked bits of resin from around the bolt holes.
This job is difficult unless you've had practice and can take you ??????.
You will need the following parts:
Roofing Brace/Jointing Plates
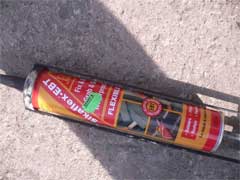
Sticks Like S**T or similar
Easy Sand Body Filler
Fiberglass Matt and Resin
Spray Paint
4mm Rivets
Large repair washer with 12mm inner diameter drilled
20mm sticky backed insulation foamYou will need the following tools:
Rubber Gloves
Angle Grinder
Sand Paper
Large Flat Head Screw Driver
Hammer
Rivet Gun
Drill
12mm Drill bit (Body Chassis Bolts)
4mm Drill Bit (Rivets)
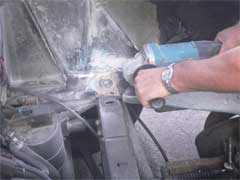
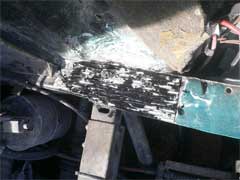
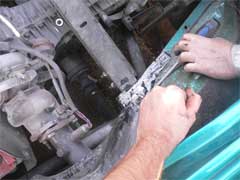
First job was to clean up the area around the bolt holes with an angle grinder removing the existing build up of resin and create some recess for the metal plate to sit in. Because of the abrasive power of the angle grinder it was used very delicately to skim the surface small amounts at a time to minimize any loss of strength in the original structure. The whole area was then thoroughly sanded by hand.
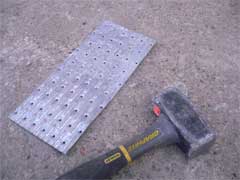
The metal plate was then hammered on concrete to flatten it out as it is slightly corrugated. Paper templates where made of both areas, transferred onto the metal plates, then the plates where cut to the templates. The metal plates where then placed into position, the 12mm bolt wholes marked, taken away and drilled.
We then used some hardening but flexible bonding glue that was recommended by our local builders merchants. Otherwise we would have used a product called ‘Sticks Like S**t’. This was squeezed all around the gap between the chassis mount and the fiberglass. We were also careful to insert as much as possible underneath the body that ‘floats’ around the chassis mounts to provide additional support when finally bolted down. The bonding glue was also spread all over where the metal plate would sit straddling the chassis bolt whole to stick the plate from end to end.
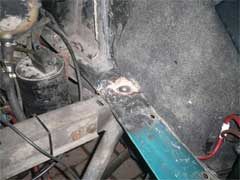
The metal plate was then placed onto the glued area and using the existing holes on the metal plate the body was drilled through at either end and riveted through to lock the plate down while the glue set. Once the rivets where through the metal plate and the body the plate was further hammered in to shape with a large flat head screw driver around the chassis bolt holes. The excess glue that had come through the screw holes in the metal plate was smoothed down across the top of the plate. The body chassis bolts where then inserted and tightened up with a large diameter repair washer on top to help lock it all down.
The same process was then repeated on the other side. First pulling out and lifting the body to get plenty of bonding glue underneath. An L shape plate was also cut to slide underneath the body and around the chassis mount to strengthen the small fibreglass piece nearest the engine. The top metal plate had the bolt hole marked and drilled. The plate was then riveted down top and bottom and then hammered into shape with a flat head screw driver around the chassis bolt hole. The body chassis bolt was locked down again using a large repair washer.
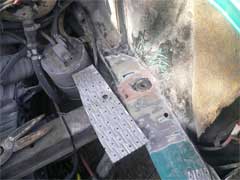
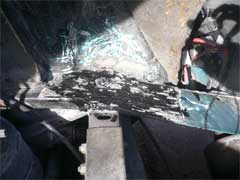
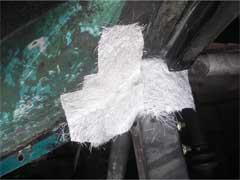
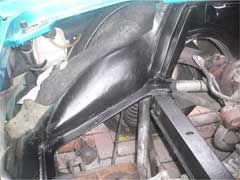
The final result for this phase looks like this.
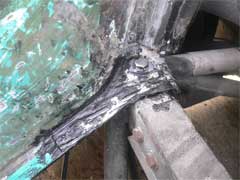
Looks a bit of a mess at this stage but already after thirty minutes the body feel solid and there is no discernable movement when rocking the body in any direction. The next job is to wrap the whole assembly in fiberglass and strengthen the joint between the metal plate and the wheel arch side wall. The fiberglass can then be filled and sanded for a smooth clean finish ready for spraying.
Cut the fiberglass matt to run down the wheel arch across the metal plate and wrap under the body. This needs to be done for both sides. The matt I used appeared to be very think for the job but once the resin was dabbed on the matt thinned out nicely.
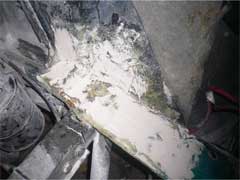
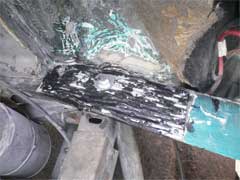
The Fiber glassing was a nightmare! It would have been ten times worse if I didn’t use rubber gloves. I attempted to do a side at a time, I should have done one piece of fiberglass at a time. The bolts where removed before I covered the metal plate and side wall in resin. The large flat washer was left in place on top of the metal plate and covered in resin. I then push the pieces of fibre glass in to position. More resin was then mixed and dabbed on to the top dry side of the fiberglass. It was a warm sunny day and the resin was going off fast. Further more the brush I used quickly became stiff making if difficult to apply the resin. Once both sides where done and left over night as I wasn’t in a rush I sanded out any big lumps smoothed in the joints with the body as best I could. Easy sand body filler was then used to create a smooth continuous finish.
Yes, the picture above make it looks like a disaster, but another round of filler and sanding provided a nice smooth contour following the original shape of the body. Because the metal plate used was relatively thin it means that there is virtually no impact on the engine bay floor.
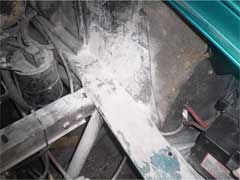

Once you are happy with the sanding and have a nice clean blend to the existing body you can mask up ready for spraying to finish the job off. This is the result after a couple of coats, some 1000 wet and dry sanding and a final spray over. The last job is just to run the 20mm insulation foam around the engine bay to create a nice seal and gasket between the body and the engine bay floor.

LEW's Verdict
Well worth doing although it took a week to complete on and off. Total time was probably about 12 hours but I wasn’t in any rush and just did each stage when I had an hour or two, giving time to let things set overnight. The body is now absolutely solid with the chassis and knowing this jobs been done provides the confidence to drive the car properly without worrying about doing any further damage to the body. If you’ve got this problem get it sorted – it can only get worse.
This mod was performed by Carl on his 1994 S4.
If you have any comments, feel free to e-mail us at admin@lotusespritworld.com
![]()
|
|