Timing Belt Change
I'm attempting to document the timing belt change on my 91SE
so that there will be a pictoral reference for others.
By Dan's Lotus Page (now removed)
While I'm at it, I'll change the alternator belt and AC belt, check the front seal, and the waterpump as well as change the cambelt idler bearing. I'll also change the air and oil filters, change the oil, coolant, and transaxle fluids. I'll also swap the oil, and intake pulleys to cure the intake retardation on the US cars.
Here are the steps from the lotus service notes, except that I've added some things in between:
*Remove engine bottom cover. You simply remove 10 or 12 bolts from the bottom of the engine bottom guard, and slide the guard out of the front slot.
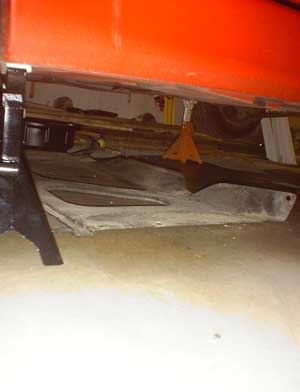
1. Drain radiator and disconnect the radiator and heater return hoses from the waterpump. Release the hose from the thermostat housing outlet elbow.
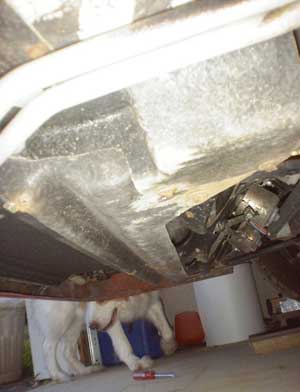
This is a view from the drivers side front of the car. The drain plug is located on the passenger side of the car on the rear of the radiator towards the bottom.
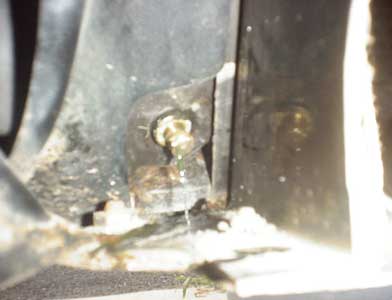
Here's the drain plug. It's hard to see from under the car, until you get your head right up against the car bottom.
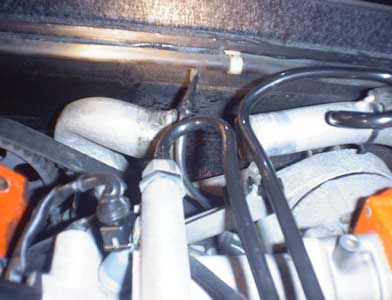
Here's a shot of the heater and radiator hoses that you have to remove from the waterpump. These are at the front of the engine and are removed from the top laying over the engine. I still have "Lotus Chargecooler" imprinted on my chest
Here the heater hose is removed (just bent up out of the way. Remove the larger radiator hose and you're done with that part. BTW. I used a stubby screwdriver to undo the hose clamps. Worked pretty well.
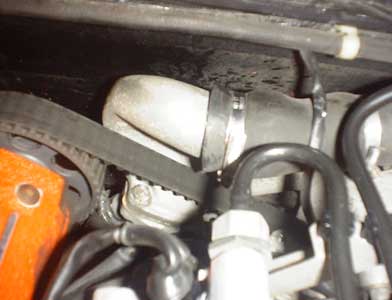
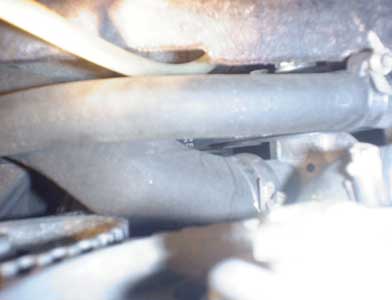
Here is the hose to the thermostat housing. Remove the two hose clamps and slide the hose off.
It's out of the way in this pic.
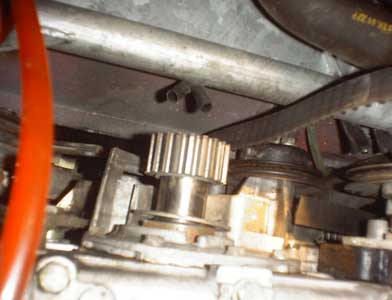
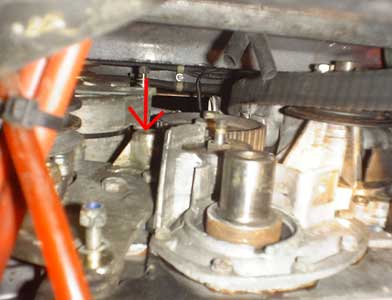
2. Turn the engine to the "timing position" with the crankshaft at no. 1 (firing) TDC and the timing dots on the camshaft pulleys facing towards each other. Use the timing marks and pointer on the flywheel rim and clutch housing apperature, viewable after removing the protective rubber grommet in the top of the clutch housing.
The timing mark you need is on top of the metal tab that the arrow points to in the picture. I used a mirror mounted on a telescopic handle to see it. I removed all the sparkplugs so that I could turn the engine over by hand using a socket on the cranksaft nut. (BE SURE NOT TO ROTATE THE ENGINE BACKWARDS)
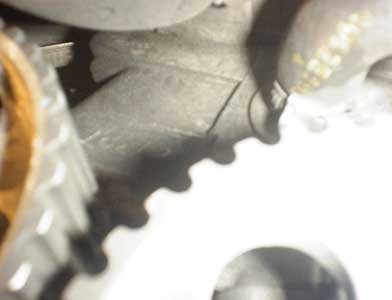
This pic came out blurry, but you can see the intake and exhaust timing gears here. There are small colored dots on the outside rim of each one that should be facing each other when you have the crankshaft at TDC. There are dots on both sides of the gears, so you dont' need a mirror to see this one while laying over top of the engine.
3. Slaken and remove auxiliary drive 'V' belts.
From the top if the car loosen the alternator bolts, and then you can slaken and remove all of the belts
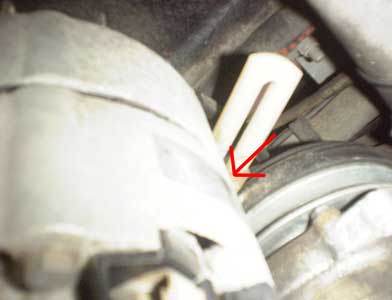
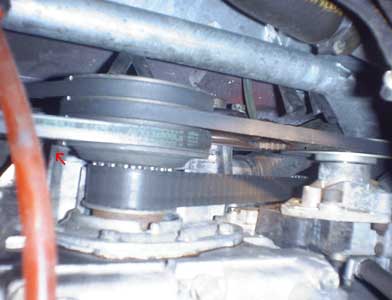
The arrow points to the the bolt that adjusts the tension on the alternator.

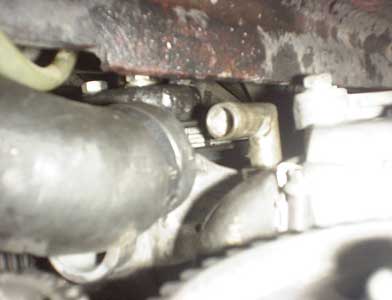
The vacum pump and water pump belt gets loosened from the bottom . You loosen the bolt shown with a 8mm allen wrench and it pivots. You may have to use a wrench with a very short blade, or even cut one off to get at the far one that you can't see in this pic.
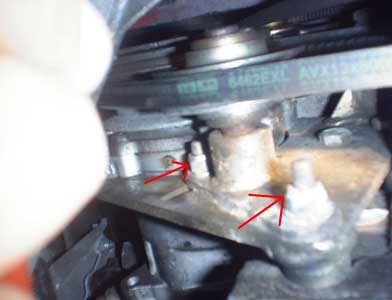
I think Lotus gave a lot of thought to working on the car later on. All of the things you need to get to, can be gotten to on this car. I found it easiest to remove the AC belt tensioner (from the bottom of the car) by removing the bolts the arrows points to. Then remove all three belts. I cut them to make it easier.
4. Remove crankshaft pulley bolt and conical washer triple 'V' pulley from crankshaft.
Pic 13 is Missing
Remove this bolt with a 19mm socket. I used a breaker bar to do this. I placed the breaker bar on the bolt and and up against the frame, then bumped the starter to break it loose. Only do this if you know what you are doing, and are very sure of yourself. Another method is to clamp some wood on both sides of the timing cams, and lock them in place, then use a breaker bar. DO not rotate the engine counter clockwise. The pulleys for the v belts slides off first, then the timing gear pulley.
Pic 14 is Missing
Pic 15 is MissingYou may have to jiggle ,or use a bit of persuasion with a rubber hammer etc. to get this to slide off. Mine came off fairly easily the first time, and a bit harder the second time (to put to a/c belt on ,see below)
There is a large washer on the rear of the shaft. Make sure you don't loose it, and make sure you put it back on!
Remove the nut from the stud shown, and then pull the idler off. Make sure you replace this bearing if you aren't totally sure it is perfect. This can wind up causing as much damage as if the timing belt slipped.
Pic 18 is Missing
The idler comming off. It rolled nicely, but I decided to replace it anyway. Stinking pep-boys charged me $25 to press the bearing off, and press on the new one. 5 minutes work...
5. Remove Triangular brace between alternator, water pump and belt tensioner bracket, taking careful note of the positioning of all spacers and washers etc.Pic 19 is Missing
This bolt which goes thru the alternator must be removed.
The bolt that resides here must be removed. (This pic shows it with the bracket already removed)
Pic 21 is MissingThen remove the last bolt in the triangular brace from the top of the engine, and remove the brace from the car.
6. RE-Check timing position before slackening the cam belt tensioner clamp nut and rotating the the tensioner eccentric away from the belt. Slide the belt off the pulleys
Here I swapped the intake cam pulley, and the aux pulley to correct the timing retardation that was done on US cars for emission purposes. I'm told that this causes much of the low end power loss.Pic 22 is Missing
The thermostat housing must be removed before you can remove the intake cam gear from the cam shaft.
Pic 23 is Missing
If you're intrested in swapping your pulleys as you do the timing belt swap,
I got some good advice from the turbo esprit list here. Check the condition of your water and vacum pumps as well as your front seal before re-assembling. I got the kits to rebuild my water pump, as well as a new front seal and gasket. I wound up not needing to replace either, but I had them just in case.
Look for leaking or a wobbly shaft on the waterpump, or any sign of leaking on the front seal.
7. Before replacing the cam belt, check the condition of all the toothed pulleys and the belt tensioner. Check that the camshafts and cranckshaft are in the timing position as in step 1. amd slide the belt onto the pulleys. Rotate the tensioner eccentric COUNTERCLOCKWISE to take up the belt slack and temporarily tighten the clamp nut. Re-Check the cam timing.Pic 24 is Missing
Here the manual wants you to use an expensive borroughs guage to check the tension. Some list member have bought the kriket guage instead for about ten dollars. Some good folks on the turbo-esprit list told me that you can also simply twiast the belt, and if you can just get it to spin 90 degrees you're all set. This is what I did.
Everything from here on is just a reversal of what you've already done. I'll only include a few tips.
8. Re-fit triple 'V' belt pulley to crankshaft with conical washer and retaining bolt. Torque tighten to 79-81 Nm (58-60 lbf.ft).
Do yourself a favor and slide the a/c belt on the compressor and the pulley before sliding it on the crankshaft.
9. Adjust cam belt tension. (as above )
10. Re-fit triangular alternator brace taking care tofit spacers and washers as noted in (5)
11. RE-fit and tension all auxiliary drive 'V' belts in order - a/c compessor, water pump/PAS pump, alternator.
12. Refit heater and coolant hoses to water pump and refill cooling system (see secion KC) KC is another section in the manual
13. Run engine for several minutes and recheck cam belt tension.
LEW's Verdict
This mod was originally found on www.rottenrodent.com/lotus/tb1.htm, but this site is now unavailable. We have recreated this guide from a Web Archive programme. We were unable to rescue all the pictures and some are missing. This guide is only intended as a rough guide to doing this work and wasn't created by Lotus Esprit World. If you feel unable to do this work, or have any doubts, please get a trained professional to do the work.
If you have any comments, feel free to e-mail us with at admin@lotusespritworld.com
Most of the instructions are pretty much spot on except for breaking the crank pulley bolt free using the starter. In my 25+ years as a professional mechanic I have only had to do that method on Subaru cars because of space. A Lotus 910 engine has an exposed flywheel on the right hand side of the motor which you can insert a flat blade screwdriver into the tooth of the flywheel against the Bell Housing to lock the motor.
If the motor moves using this method it will only be off one tooth to realign and not cause any valve damage. I would not recommend using the starter to break the crankshaft bolt loose on this motor.
When the crank bolt is set to spec this method can also be used. I zip-tie the belt to the cam shafts. To protect the belt from the zip-tie I make a small paper towel padding on top of the belt and zip the belt tight on both intake and exhaust pulleys. Mark the bottom crank pulley gear at 6 o'clock with a paint pen and a matching mark on the seal housing. Rotate the crank pulley one tooth backward [ counterclockwise]. Slip the belt over the pulleys with all of the slack on the tensioner side. When you rotate the crank clockwise that one tooth will take the slack up between the exhaust cam and the crank without disturbing the cam timing.
Tension the belt, tighten the tensioner. To make things easier, remove the plugs and have car in neutral with front and rear wheels chocked so the car doesn't roll over your head. Turn the motor over by hand clockwise at least three TDC times making sure the timing marks are spot on every time also checking tension each time.
I've replaced timing belts on cars from Audi to Volvo through my years in the trade and this is the second time on my Esprit.
Cheers,
Robert
![]()
|
|