Electric Chargecooler Pump
Fed up with replacing your impeller, or
just want to upgrade for reliability
This modification is a hot debate, basically the mechanical chargecooler pump works well, but needs servicing with new seals and impellor. This is costly and time consuming and pumps have been known to fail more regularly than the recommended service schedule. You're unlikely to notice any failure, as it will be gradual as the impellor starts to break up. Performance will fall and you'll be none the wiser (unless you're a regular on LEW) until you realise your Esprit isn't as fast as everyone else's.
How Do I Know If My Pump Is Broken?
Well, you don't really know. If you go out for a longish journey, the charge-cooler case will be cool to touch. A more scientific approach is to connect a scantool such as that excellent FreeScan program ;-) and check what the MAT sensor is reading during a journey.It should read not much more than ambient, approximately 5 to 10 degC more. Mine was reading 53 degC.
The best test is to go out for a run in the car and park it with the engine off. Wait 15 minutes and the charge-cooler will heat up (because it's on top of the engine!). Connect FreeScan and you'll see a reasonably high MAT reading. Go out for a journey and after a few minutes, depending on your road speed, the MAT should start to reduce. If it does not, your charge-cooler pump is probably knackered.
An electrical pump takes away the maintenance and recurring costs, being more reliable and keeping your engine performing. The outlay for the new pump will soon be covered by the savings of not having to fork out for service kits for the mechanical pump (providing you keep your Esprit long enough) and the labour to take the pump out again. The electrical pump should out live the life of the car, in theory.
As for performance, well the electrical one will out perform a mechanical pump in need of attention or one that's stopped working, as for matching a fully working one. That's the hot debate. The Electrical pump will pump a constant flow from the moment you start it. The mechanical one works of the engine revs, turning half of the engine rpm. So as the engine speeds up the flow increases and as the engine slows, so does the flow.
How this affects the performance of the chargecooler system isn't overly clear. Both pump enough to keep everything safe and giving the performance intend. Some will believe the mechanical one is better, others that the electrical one gives the better performance. Here at LEW we don't really want to get into a debate on this, we advise you to fit an electrical pump only once the mechanical one fails. You'll save in the long run, your Esprit will be more reliable and we believe that any difference isn't going to be worth worrying about for 99% of owners.
We of course didn't take our own advice and took out a perfectly good pump, which had only been repaired 3 years ago and was working great, just so we could bring you this guide. Was it worth it? Well we spend a weekend fitting it, lost skin off our knuckles and threw a few tantrams. So WAS it worth it?
You can read more about the Lotus chargecooler system here
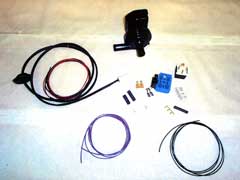
The kit
We look around at the available pumps on the market and talk to a few owners who have fitting pumps to their Esprits. We ended up deciding on getting WC Engineering's Pump (watch out for UK Import Duty, as this adds to the final cost). Mainly for two reasons. WC's pump is for sale to Esprit owners and isn't sold by them for other purposes (so they'd hopefully done most of the hard work deciding on the best version). They also supply the plug and bracket, which is an important part of the install. The pump seemed to cover everything including life, flow, size and price.On receiving the pump, we contacted Lotus, who we then supplied the pump to. They OK'd the spec and worked out the best way to fit the new part and still comply to regulations if Lotus ever need to sell a version themselves. Looking towards the future, when parts for the old mechanical one may become unavailable.
Lotus supplied the following fitting guide and a wiring loom for installation, which is what you see below. LEW believes this is the best way to fit the pump and the best pump for 99% of owners.
Wiring Instructions
Lotus Cars recommended Electrical wiring installation for the addtion of an Electrically powered pump to replace mechanical driven chargecooler pumps.
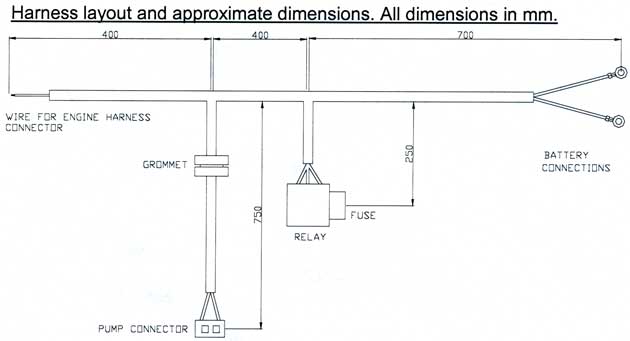
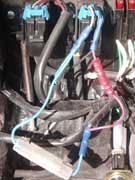
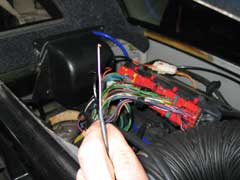
The first step is to lenghten the plug wires that come with the pump connector. This should be done using 'Splice' crimps or making some of these from cutting some terminals in half. Crimp these securely, solder then apply heat shrink sleeving.
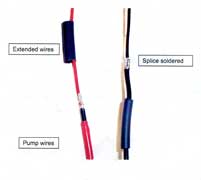
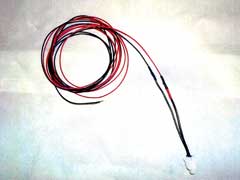
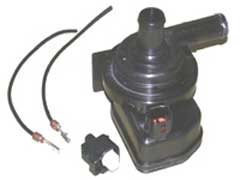
The plug and wires should now look like the middle picture above. Due to the high temperatures in the engine bay it is recommended that a high temperature sleeving is used to protect the wires. A grommet is required to allow the harness to pass through the RHS engine bay wall next to the air box filter. All the other parts needed to complete the installation are shown above right.
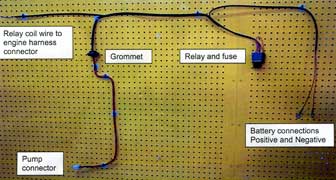
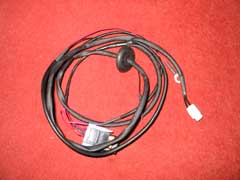
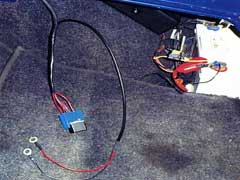
With the parts the finished harness should look something like this. Except for the red over taped breakout which is for help with the routing later. The harnes above left is shown in the position it will sit in the car.
|
You will need the following parts: 1.0mm
Red wire approximate 3000mm
|
You will need the following tools: Solder |
Installation Guide
This is a job quite involved and includes bleeding the system, look at between half a day and a full day depending on your ability.
|
You will need the following parts: Electric
Chargecooler Pump
|
You will need the following tools: Socket
Set |
Other Pump Options
These are different pumps available, giving you a wider choice.AVT/Bosch Chargecooler pump £89.99 from www.chargecooler.co.uk
Davis Craig from Demon Tweeks UK
Mercedes Benz Auxiliary Cooling Electric Pump.Wiring
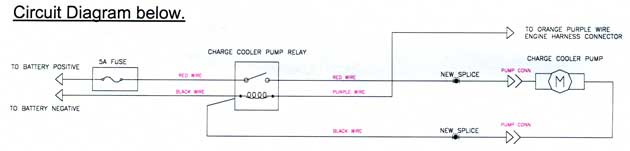
We used a wiring loom provided by Lotus Engineers, who took our pump and designed the install. Instructions on the Loom are above. The pump can be installed using a simple inline fuse to an ignition live, which is what most owners have done previously. Basic pictures of this can been seen at the end of this section of the guide.
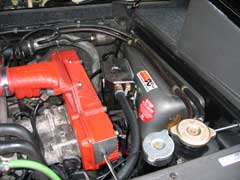
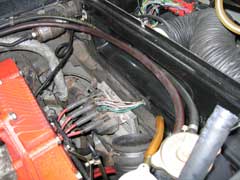
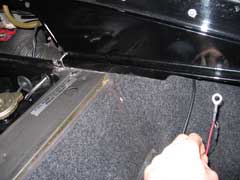
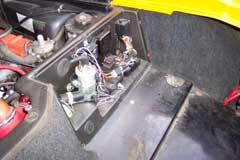
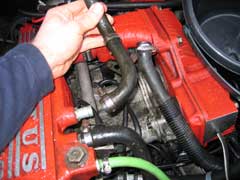
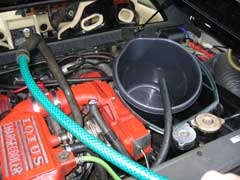
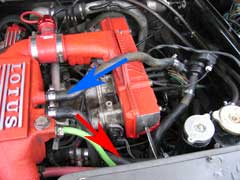
Firstly you need to make some room to see the pump and sort the wiring out. Remove the airbox from the engine bay for access and also remove the carpeted trim panel in the rear quarter window/engine bay area (known as the tank board cover).

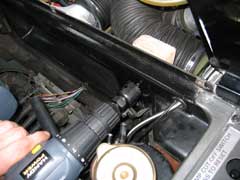
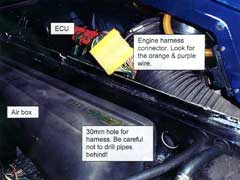
Now we can see the pump (well sort of) behind the oil filter opposite the airbox. You'll need to sit in the boot and stick you're head in! More on the pump later, we're going to get the wiring done first. For the install of the loom we drilled at 30mm hole in the side panel. We used a small block of wood the other side to make sure we didn't go through and damage anything.
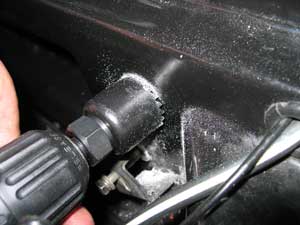
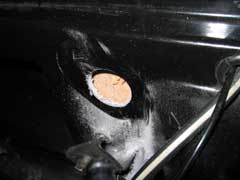
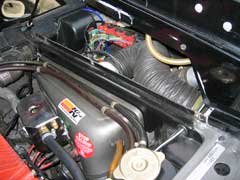
A nice clean hole was drilled in the side panel giving us a feed through to the ECU area where we will be taking an ignition live from and also feeding through to the battery for the power.

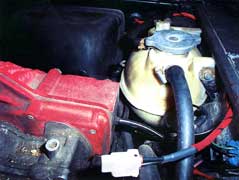
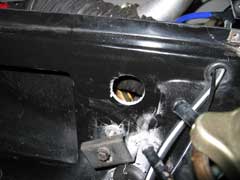
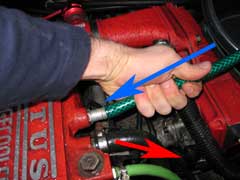
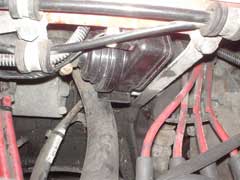
The loom feeds through and has a gromet for sealing. The connection to the pump then routes behind the coolant tank. Here there are some white plastic P-clips that have vacuum pipes routed here. Follow this route towards the chargecooler where the pump will be located. The harness has been over taped in red just to help with the showing of the routing.
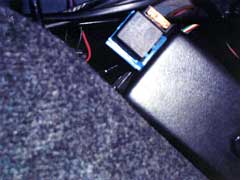
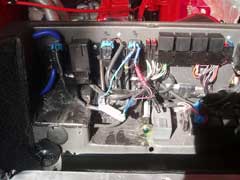
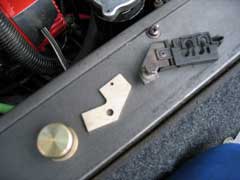
We now feed the wiring through the car, with the power feeding nicely through to the battery. Then attach the relay and fuse to the existing relay box. A rivet and washer can be used or alternatively if you want the cover to be 100% removable a piece of 3M velcro can be used. On models without the relay box in that position, the relay can sits under the airbox pipe. The switch wire comes up by the yellow terminal box, where it will be sliced into an ignition live.
Disconnect the battery when working with the electrical system on the Esprit, although you will need to do a small test later, which will require reconnection.
Connect the live and earth to the battery. Be careful not to snag the two new wires. Now it's time to connect the switch. See below how to slice the power in, but before you do. We found it easier while fitting to cut a long piece of wire and connect it to the switch, then you can touch this onto the battery to get the pump to run. If you connect it up to the car, you'll need to actually run the engine to get the pump to run, which is a pain when you're bleeding the system and checking the pump. Once everything's working, you can disconnect the extra piece of wire and slice into the cars electrics.
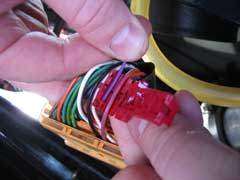


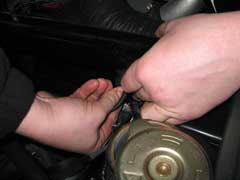
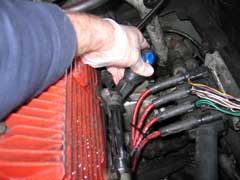
The switch (purple) now needs slicing into an ignition live, we originally used the device above to slice the switch in, but later soldered the connection when we had the equipment available. Use the purple and orange wire going into the yellow connect box seen above. This is the power for the from the ECU to the fuel pump relay coil, which is only activate once the engine is running (so not exactly an ignition live), this will start the pump running once the engine is running.
There is only one orange and purple in this connector and the cavity within the engine harness connector can vary from between different model years of vehicle. To check simply attach a DVM or test lamp and start the engine. The output from the ECU is a 'High side Driver output' i.e. positive 12.0 volt outs.
Alternate Wiring without loom
Here are two shots of how Dermot wires the pump with an ignition live without the use of the wiring loom. It is tapped into the right hand solenoid in the panel in the boot area. This get a live on turning on the ignition. You see the inline fuse for the pump. Purple and blue comes in through the bulkhead directly from the pump, no relay or anything else needed.
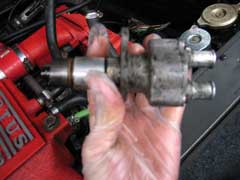
Removing Old Pump

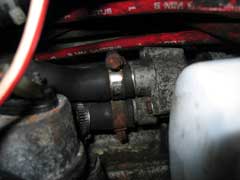
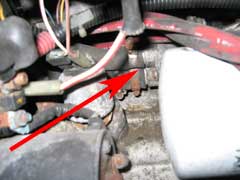
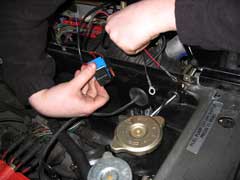
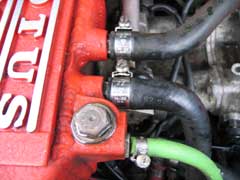
Now to get the old pump out. First we removed the piping from the pump. These are held on with jubliee clips. Remove these with a screwdriver. You'll lose some fluid at this point, so don't be alarmed. Pull the pipes away from the pump to give better access. You won't be able to see and work, so you'll be working by feel most of the time. As you can see from the diagram above, there's one bolt holding the pump. We finally found a use for our rachet spanners, as we could get good access with them from above. You can use a socket, but you won't get to much of a turn. Be careful not to start undoing the bolts for the oil pump housing, as we did!!!!!
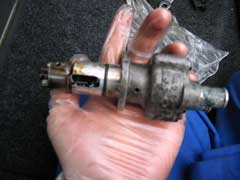
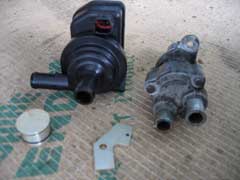
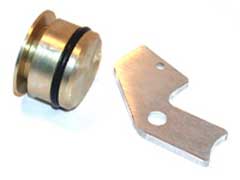
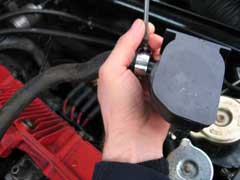
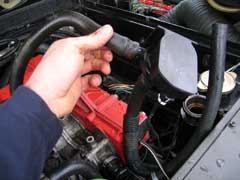
Once the bolt is remove, you should be able to pull the old pump straight out. Ours was stiff and needed some encouragement. You can now see the old mechanical pump along side it's electrical replacement with the plug and bracket to fill the hole left behind.
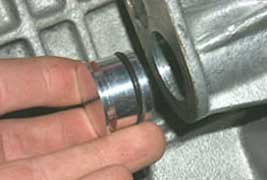
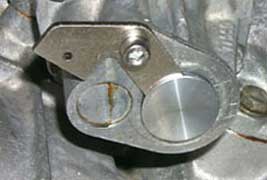
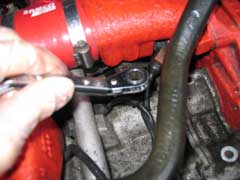
Unfortunately we couldn't get any pictures of fitting the plug, needed to fill the hole where the old pump came out from. This hole must be filled. We used the WC plug we ordered at the same time as the pump. Basically the piece attached to the bolt you removed is replaced by the new bracket (see above right). This fits in the recess of the plug and stops it coming out. Push the plug into the hole, then line up the bracket in the recess on the plug, use the bolt to screw back in to hold the bracket and in turn stopping the plug from falling out under pressure.
Flushing & bleeding system
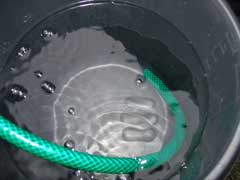
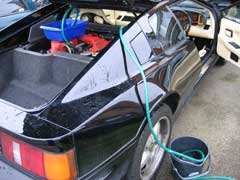
Now to flush the system, refill with some anti-freeze and bleed before putting everything back together. You should have pipe ends that were taken off the old pump. One goes to the chargecooler carrying cold water from the pump, the other comes from the radiators via the chargecooler. You can flush the system by attaching a garden hose to one end and putting the other in a bucket. Turning on the hose will flush the system out. You only needed a flow of water, so don't go turning the tap full on!

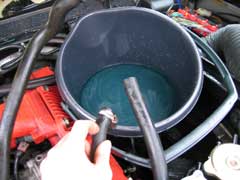
The pump was then fitted and we primed the system with clean water from the hose (no airlocks of course). Then using small plastic bucket fitted as low as poss. and a length of hose to connect to the new pump inlet, I stood this bucket on top of the CC and with the inlet pipe (return from rad) extended to return to the bucket, switch on and we have a system running by passing the 'cooler, perfect , let it run for a few minutes to check the flow and switch off.
Next step is to reconnect the inlet pipe to the cooler and fit a pipe to outlet from cooler into a second bucket in the boot, switch on and check the flow watching the level of clear water in the bucket on top of the CC. Before you run this bucket dry, stop and fill with antifreeze mix, start pump again and when the coloured antifreeze starts to run into lower bucket stop and connect the CC outlet to the new pump inlet.
Take the top plug out of the CC and top up, run the pump topping up the CC and there you have it. You can now connect the switch wire that you had connected directly to the battery up to the correct wires to complete the system.
You have a few option on where to fit the new pump. We've fitted ours in the same location as the old one. It wedges in quite nicely and can be supported with some cable-ties. You can also fit it nearer the chargecooler, or underneath the airbox. The choice is yours. Once everything's back together, check all the connections, then either use FreeScan to check the systems working ok, or use the old 'Hand on the Chargecooler' trick. Don't blame us if you burn your hand!
Verdict
This is a personal choice on whether to keep the original pump or go with an Electric version. You're unlikely to be able to tell the difference while driving between the two, so it's more down to reliability, cost and originality. We believe long term owners of Esprit are best going for an electrical pump. The install isn't particularly difficult, although it looks it, we found the bleeding of the system the worst part. We're happy just to know our chargecooler is working and will be working.
![]()
This mod was performed by Lotus Esprit World on their 1992 SE
If you have any comments, feel free to e-mail me with at admin@lotusespritworld.com
|
|