
Esprit Rear Brake Upgrade
This installation guide is designed to show you how to replace the rear brakes on a Pre-Brembo equipped Esprit (MY87-MY93). This will include replacing the discs, pads, calipers and hoses. This guide can also be used for those wishing to replace discs or pads on Esprit that comes with the brembo set-up (MY94-MY00)
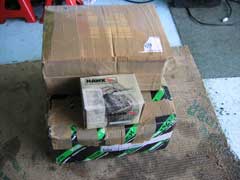
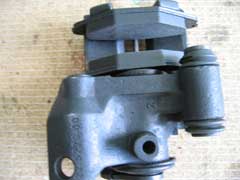
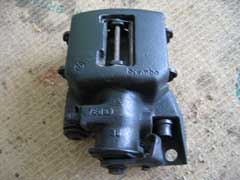
The Esprit brake upgrade shown here uses a kit supplied by PNM Engineering. The kit contains 2x 304mm Ventilated Brake Discs (grooved), 2x Brembo 1 pot Calipers, 2 x braided brake hoses, 2x alloy caliper mounting brackets, assorted nuts, washers & bolts. Brake pads are not included in the kit, so you can choose your own. They are the same as the V8 and Elise, so there's plenty of choice. We went for brake pads manufactured by Hawk as they should perform well with the grooved discs and match the pads we are running on the front of our Esprit.
We will be reviewing the kits performance in the very near future, once we've bedded them in and had the chance to see the improvements over the standard equipment. The balance of the brakes should be good as this kit matches up with the front kit fitted earlier to our Esprit.
Anything shown below is only a guide. You take the work on at your own risk and Lotus Esprit World or PNM Engineering take no liability for anything you do on your own Esprit. If in doubt leave it to a professional.
Installation
This is quite a large job and depending on your ability should take around 5 hours.
| Parts supplied by: |
 |
|
You will need the following parts: Brake
Kit |
You will need the following tools: 8,
10, 11, 13, 14, 15, 17, 19mm socket/spanners |


The kit contains the following: 2 vented 304mm discs, 4 retaining screws, 2 brackets, 4 bracket mounting bolts & washers, 2 Brembo rear calipers, 2 Caliper mounting cap bolts (M8), 2 Caliper mounting bolts (M10) & washers, 2 brake hoses (braided) and 1 set of rear brake pads (sold separately).
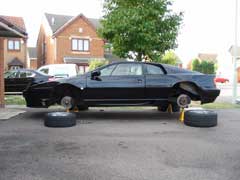

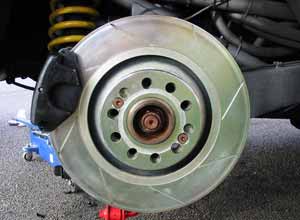
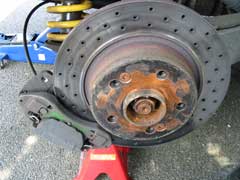
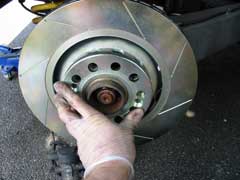
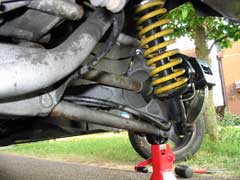
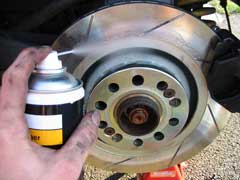
Jack the Esprit up, supporting with axle stands. Take the wheels off and take time to take one last look at the old brakes. Ours are in pretty good nick, as we only changed and discs and pads a while ago.
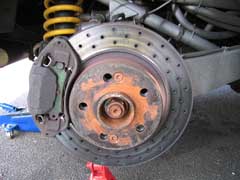

We also had drilled discs, which look pretty good. But not as good as what's about to be fitted. We jacked the whole car up and removed all four wheels, as the system will need bleeding, which you'll need access to the front calipers.
Time to remove the old brakes. We removed the pads and caliper as one. Two 19mm bolts hold the calipers on. This might be stiff after years on the Esprit. Some WD40 might help, but remember not to get any on the brake discs or pads.
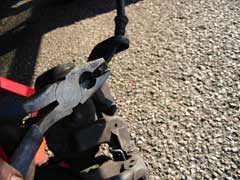
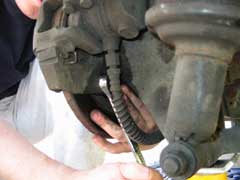
If you've remembered to take off the handbrake, the calipers should slide off the discs. You may need to give them some help. We use a rubber mallet to help ours come off! Once the calipers off you can remove the handbrake cable from the caliper. A pair of pliers should easily remove the cable by unhooking the end.


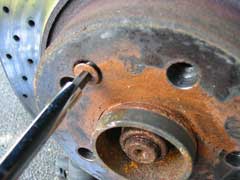
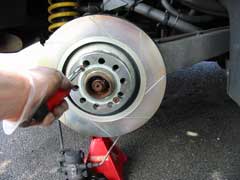
Time to remove the old solid disc to make way for a bigger vented version. You should have two retaining screws holding the disc on. Ours where star shaped heads. You may again find these stiff and they may take some effort to remove.

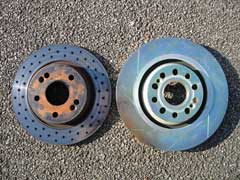
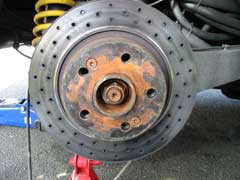
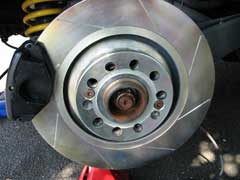
Once the screws have been removed the disc should come off. If not, a rubber mallet on the back of the disc should encourage it to remove itself. Our discs are pretty new so still look good. There's quite a difference between the old and new discs.
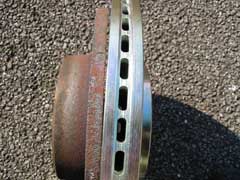
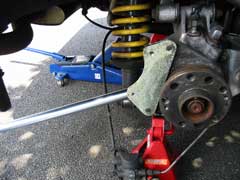
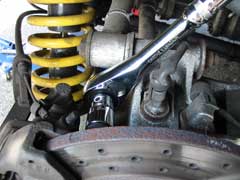
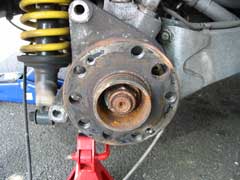
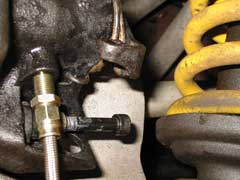
Solid verses vented is no competition, almost twice the disc! We now need to add the caliper bracket to the old mounting holes. The bracket goes with the counterbored hole at the top facing in, as you can see from the middle picture above, which was taken from above. Screw the 19mm bolts back in and tighten to 48 lbs ft.
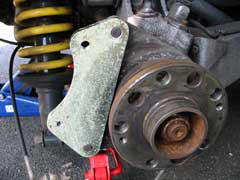
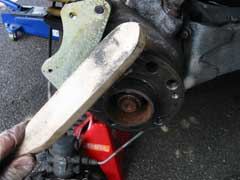

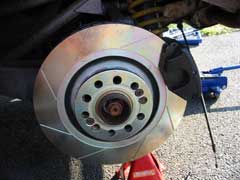
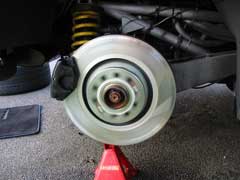
With the bracket in place you can clean up the hub ready for the disc. We used a wire brush to make sure the surface is clean. Ours were in good condition, as we'd already changed the discs a while ago. Yours may take a little more work! Now time to get that gleaming new disc on.
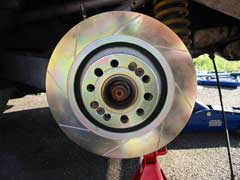
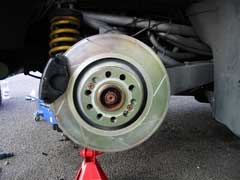
You'll need to line up the disc with one set of holes that match the hub. These discs have been drilled to fit the Esprit, but the old holes don't. The two screws will fit either way, so make sure you don't get it the wrong way round, as we did. We only noticed when we went to put the wheel back on. So everything had to come off! The other side was ok, luckily. Line up the disc and screw the two retaining screws in. New screws are supplied with the kit which are allen heads. Now we have a nice shiny disc on our Esprit.
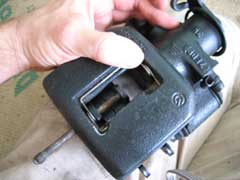
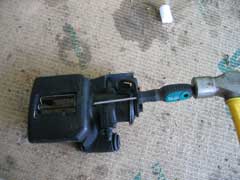
Now to the calipers. Remove the retaining pin than runs through the caliper. We used a screwdriver and gave it a tap with a hammer, which released the pin. Make sure the piston is wound all the way in. Do do this turn it anti-clockwise while pushing in.
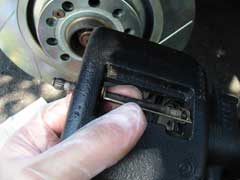
The pads sit in the caliper fairly loosely, feed the pin back through the anti-rattle pin and through the pads. You can copper slip the back of the pads, which is said to help reduce squeaking and stop binding. We forgot to do ours!
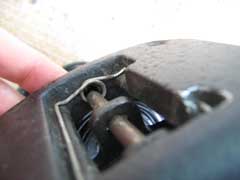
Once through both sides, a light tap with the same screwdriver, hammer combination on the other end will see the pin safely home.
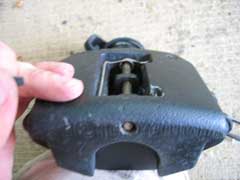

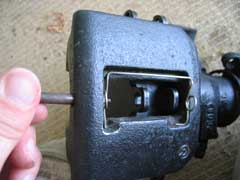
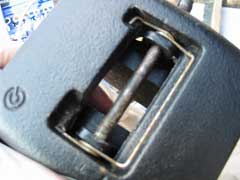
How you're calipers ready to go on the disc. The bleed nipple should go at the top of the caliper, this will stop you putting them on the wrong way round and will make it much easier to bleed the caliper!
We had a few issues getting our hoses off and ended up fitting the hoses to the caliper first before mounting them. Basically the one hose end was stuck, meaning we couldn't screw both stationary ends. So the caliper end was screwed in first and then the caliper turn to screw into the car end.
Mounting the caliper is easy, the pads we're pretty tight going on to the disc though. To unwind the caliper piston, turn anti clockwise while pushing in (as mention above). The big gold bolt goes at the top and the smaller allen head bold goes in the bottom end to attach the caliper to the bracket. Torque the bolts as follows: M10 bolts to 33-37 lbs ft, M8 bolts to 19-22 lbs ft
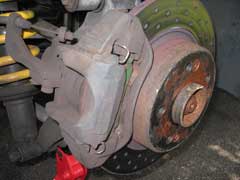
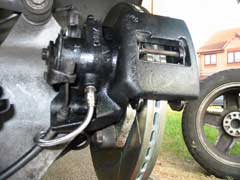
We now have something looking like a rear brake set-up. The caliper looks pretty small (same as on the rear of the Sport 350), but is holding some large pads that cover almost every cm of the disc. Now for the messy bit, attaching the brake hoses.
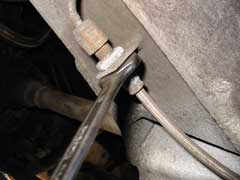
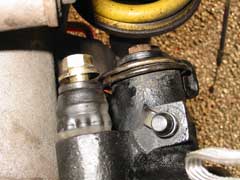
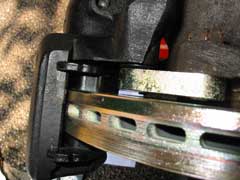
Undo the hose attached to the caliper, then the other end attached to the car. Be careful with the brake fluid as you don't want to get it on your paint work. The hoses have different sized nuts so you can attach the hoses. 11mm, 13mm and 17mm are the three we used. Be careful as if yours haven't been moved before, then they could be very stiff and the pipes can easily snap if too much pressure is placed on them. We found it best to attach the hose to the caliper first and then attach to the car. Make sure all the connection are tight.
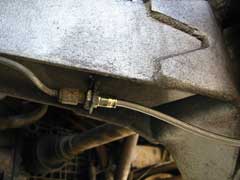
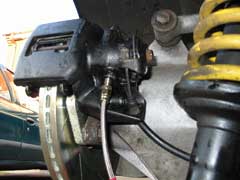
Above is the attachment to the old caliper and the new hose connected to the new caliper. Note our caliper is still not attached to the bracket, with the M8 bolt running at 90° from the hose. Now we have the caliper attached to the braking system, we need to link it to the handbrake.
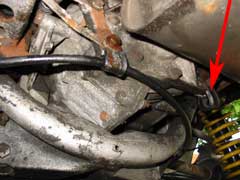
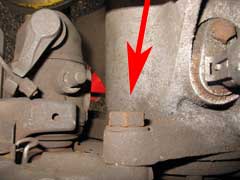
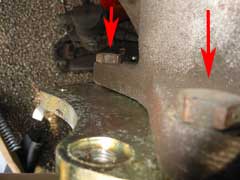
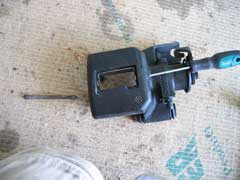
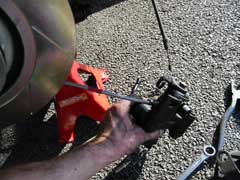
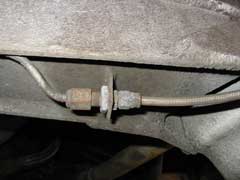
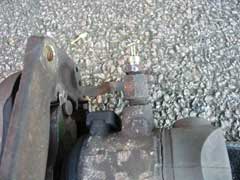
The handbrake cable will attach straight to the off-side set-up. The near-side needs to be re-routed to reach. We undid one of the brackets holding the cable to by-pass it to create more length. The red arrow shows the by-passed bracket.
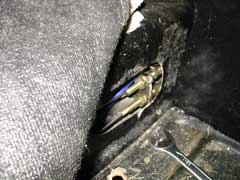
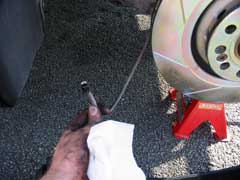
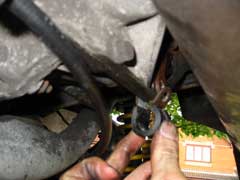
You can now attached the handbrake cable to the caliper, pushing it up through the hole and then hooking the wire over the arm. You can see the handbrake cable on both sides in the two pics above. Check the operation of the handbrake. Ours was now too tight and the pads where holding the disc solid. Adjust the handbrake cable by using the adjusters situated in the inner sill of the drivers side. We removed our seat for better access.
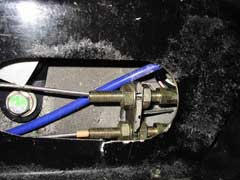
Towards the back, pull the carpet away and you'll see the cable adjusters. Loosen or tighten these to set up the handbrake. You should now have a working system. As you've removed the hoses, air will be in the hydraulic system, so you will need to bleed the brakes. Once this is done you can clean the new set-up with some brake cleaner and clean the hub and wheel nuts. Double check all the connections and check for leaks.
 !
!
We ran ours on the axle stands to make sure everything was ok. Nice to see the discs spinning away! Put the wheels back on and test the brakes. Bedding-in instructions will come with the pads. You now have a more powerful rear brake set-up.
Verdict
We will follow this install with a review of the brake upgrade once we've had time to test it. Our verdict on the installation is as follows. Although the process looks pretty simple. It took a lot longer than we thought it would. None of it is really taxing if you have an idea of what you are doing. You'll need the right tools before you start and plenty of time. Following this guide should making to job a lot easier than we found it and we would be happy to do the job again now and enjoyed working on the Esprit.
That said, you will have to decide if you wish to undertake this work or whether you feel it would be best left to a professional. Remember your brakes are a very important part of your car and work should not be undertaken if you are not capable.
This installation is to show you how to change the rear brakes on an Esprit. It also shows you what we've done to our Esprit and what's available on the market. These modifications aren't always the right thing to do for every owner. Think carefully before deciding to modify your Esprit.
On that note the original brake set-up on an SE isn't up to the cars power. This kit, along with the front kit, gives the Esprit brakes to match it's performance and making you safer on the road. We love the new set-up, we love the price. We're very happy!
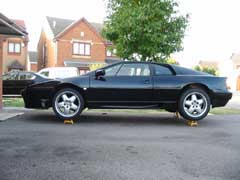
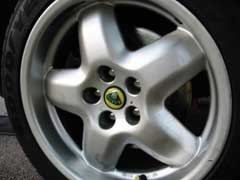
And on a compatibility note, both the Front and rear kit will fit under the 16" Rears and 15" Front SE alloy wheels.
Review
We've not bedded in our brakes and given them a good testing on the roads (we have not track tested). We've found the set-up to be very balanced and provide great stopping ability compared with the standard set-up. Pedal feels isn't great due to the ABS fitted, but the brakes are powerful and give much, much more confidence. We haven't suffered any brake-fade as we had previously.
We do believe it is important to match the front and rear kits. Especially for those without ABS.
From our experience, we would fully recommend this kit and the front kits from PNM.
Prices
The kit is available for the Bendix equipped Esprit's.
| PNMJ8304G | Rear Brake Kit | £545.00+VAT |
| PNMJ4027 | Hawk Fast Road Pads | £48.82+VAT |
Please check current prices with PNM, as these are subject to change.
This mod was performed by LEW on their 1992 SE
If you have any comments, feel free to e-mail LEW at admin@lotusespritworld.com
|
|

